JupyterLab computational environment desktop application, based on Electron.
JupyterLab is an integrated computational environment designed for interactive computing, data analysis, and visualization. It provides a seamless platform for coding, debugging, and visualizing results in a single interface.
Key Features:
Multi-language support for Python, R, Julia, and more.
Real-time collaboration with live code editing and sharing capabilities.
Interactive notebooks that combine code, text, images, and outputs in one place.
Support for extensions to customize the workspace according to specific needs.
Integration with popular tools like Git, Anaconda, and JupyterHub.
Audience & Benefit:
Ideal for data scientists, developers, researchers, educators, and students who need a versatile environment for computational tasks. It enables users to streamline workflows, collaborate effectively, and explore complex datasets with ease. Installable via winget, it is cross-platform and works on Windows, macOS, and Linux.
README
JupyterLab Desktop
> [!CAUTION]
> As of August 2025, JupyterLab Desktop is not actively maintained and does not receive security bug fixes. Using JupyterLab Desktop for sensitive data, or with untrusted notebooks/extensions is not recommended.
> If you would like to contribute and help with maintenance, please get in touch by leaving a comment on the issue discussing project archival.
JupyterLab Desktop is the cross-platform desktop application for JupyterLab. It is the quickest and easiest way to get started with Jupyter notebooks on your personal computer, with the flexibility for advanced use cases.
Installation
Install JupyterLab Desktop using one of the methods listed below for your system.
Additionally, JupyterLab Desktop can be installed on Windows via winget: winget install jupyterlab.
If you need to remove a previous JupyterLab Desktop installation, please follow the uninstall instructions.
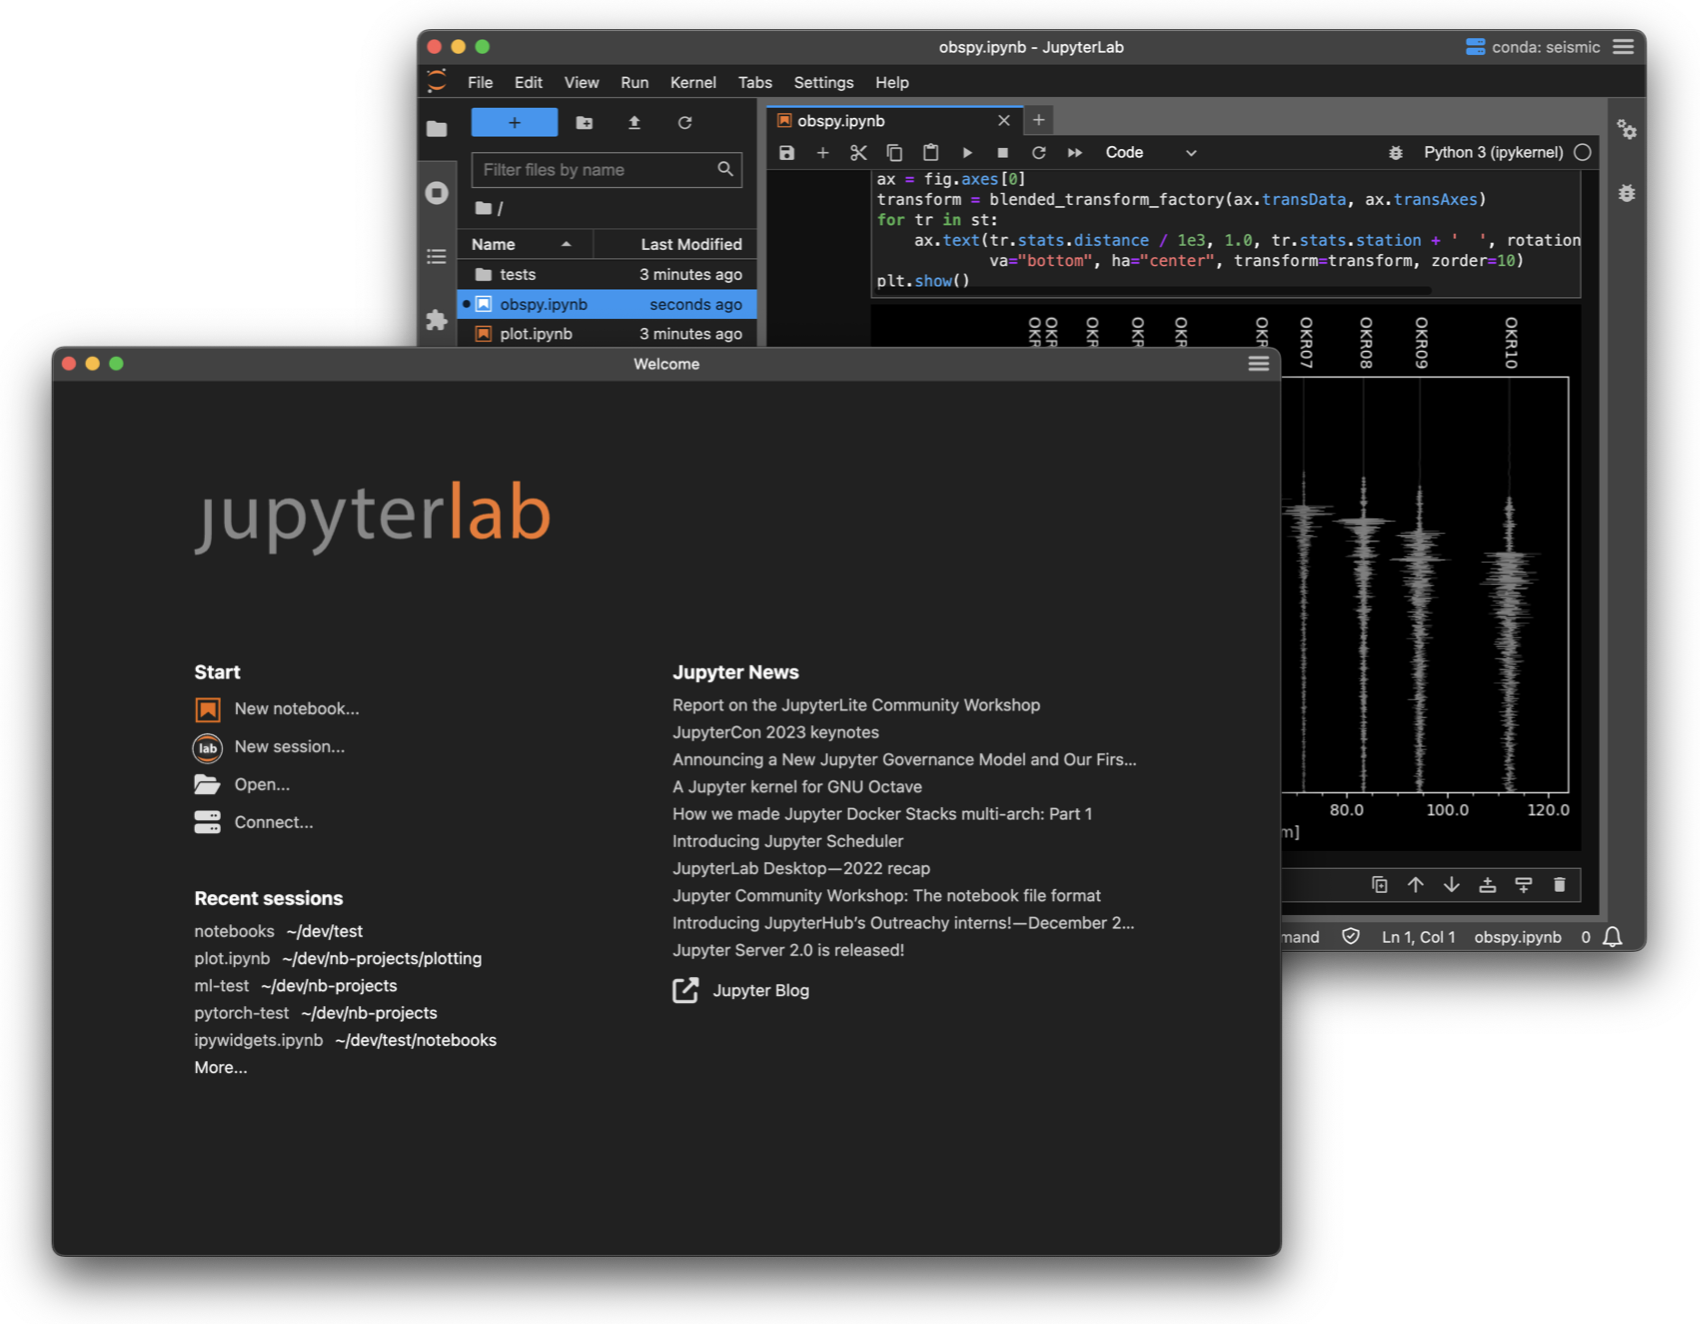
Launching JupyterLab Desktop
JupyterLab Desktop can be launched from the GUI of your operating system by clicking the application's icon or by using jlab command from the command line. Double clicking .ipynb files is also supported and it will launch JupyterLab Desktop and load the notebook file.
JupyterLab Desktop sets File Browser's root directory based on the launch method.
If launched from the application icon on GUI or by using jlab command without any arguments, then the default working directory is set as the root directory. The default working directory is user home directory but it can be customized from the Settings dialog.
If launched by double clicking .ipynb file or jlab command with a file path as the argument, then file's parent directory is set as the root directory. Similarly, if a file is opened using the Open... or Open File... links in the Start section or by using drag & drop, then file's parent directory is set as the root directory.
If jlab command is used with a directory path as the argument or with the --working-dir argument then the directory in the argument is set as the root directory. Similarly, if a folder is opened using the Open Folder... link in the Start section or by using drag & drop, then the opened directory is set as the root directory
Sessions and Projects
Sessions represent local project launches and connections to existing JupyterLab servers. Each JupyterLab UI window in the app is associated with a separate session and sessions can be restored with the same configuration later on.
Each launch of JupyterLab in a different working directory is a separate project and projects can have their own configuration such as Python environment and UI layout.
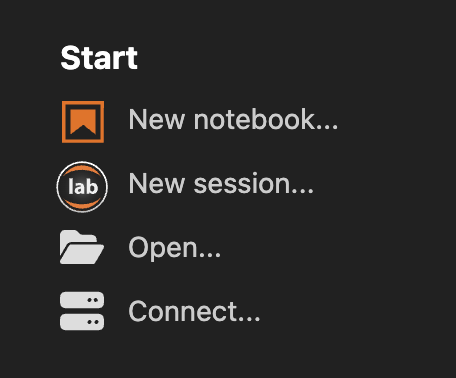
Session start options
You can start a new session by using the links at the Start section of the Welcome Page.
New notebook... creates a new notebook in the default working directory.
New session... launches a new JupyterLab session in the default working directory.
Open... starts a new JupyterLab session in the selected working directory. If files are chosen, selected files' parent directory becomes the working directory and selected files are opened in the session. On Windows and Linux Open Folder... and Open Files... options are presented as separate items.
Connect... creates a session by connecting to an existing JupyterLab server running locally or remotely. Locally running JupyterLab servers are automatically detected and listed in the Connect dialog.
Similarly, CLI launches of the application, dropping files and folders, and double clicking to open files create new sessions as well.
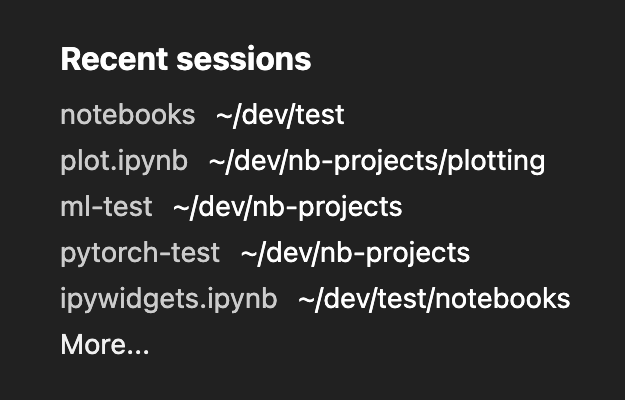
Previously opened sessions are stored as part of application data and they are listed on Welcome Page. Clicking an item in the Recent sessions list restores the selected session.
jlab command-line launch examples
Open directories using relative or absolute path
jlab . launch in current directory
jlab ../notebooks launch with relative path
jlab /Users/username/notebooks launch with absolute path
Open notebooks and other files using relative or absolute path
jlab /Users/username/notebooks/test.ipynb launch notebook with absolute path
jlab ../notebooks/test.ipynb launch notebook with relative path
jlab ../test.py launch python file with relative path
Open with a custom Python environment
jlab --python-path /Users/username/custom_env/bin/python ../notebooks/test.ipynb launch notebook with custom Python environment